Comprehensive Guide to Building Chicken Coops
Building chicken coops may seem like a straightforward construction, yet it stands as a crucial cornerstone to maintain a joyful and vigorous brood of chickens. The precise details of your coop will certainly depend on your chickens’ breed and your geographical location. However, these general guidelines and significant pointers will aid anyone in constructing a reliable and secure haven for their hens!
The ultimate objective while crafting a chicken coop is to create a fortress that shields your hens from threats like predators, dampness, drafts, illness, excessive heat, extreme cold, and the risk of escape. Getting it spot-on is paramount for the thriving existence of your flock.
Planning Your Chicken Coop:
Consider Your Flock Size
The first step in building chicken coops is to estimate the number of chickens you intend to keep. Why is this so crucial? Well, the size of your flock will directly influence the dimensions of the coop you need to build.
Understand that when chickens feel overcrowded, they can become stressed and agitated. This stress often manifests in pecking, and other aggressive behaviors, which could lead to injuries and general unrest in your flock. So, providing enough space is not just about comfort, it’s about promoting a harmonious and peaceful environment for your chickens.

As a universally accepted guideline, each chicken requires approximately 2 to 3 square feet of space within the coop. This ensures that every chicken has enough room to move around comfortably, without feeling cramped or restricted.
Choosing the Location
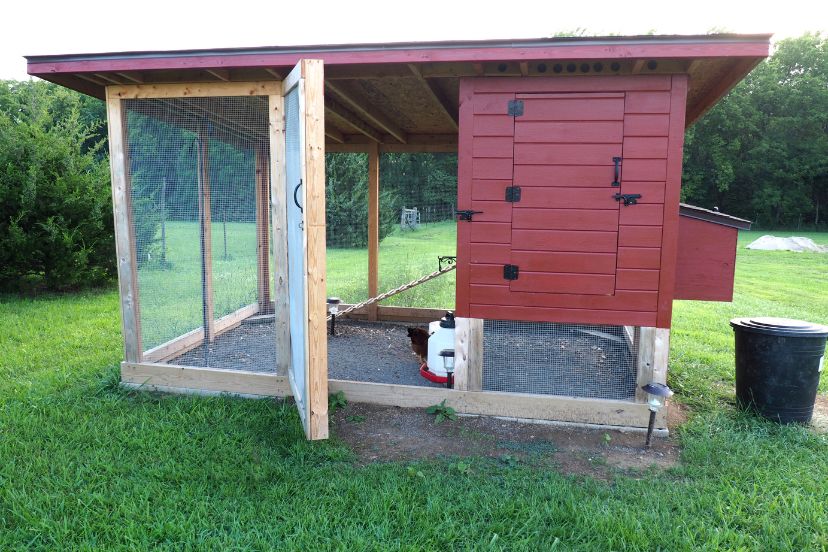
Positioning your chicken coop appropriately on your property is a significant step towards promoting cleanliness in the coop and safeguarding your flock. Building chicken coops on elevated ground is crucial to bypass complications arising from floods, mud, and accumulations of water and dampness. In instances where elevated ground isn’t available, constructing a raised coop is the solution to ensure your chickens remain dry.
Sunlight is a major stimulant for egg production so ensure your coop isn’t perpetually under shade. A southern-facing location promises extended periods of warmth and sunlight. But don’t forget about the hotter seasons. Positioning your coop near a high-canopied tree can provide cooling shade during high temperatures, or alternatively, a shade tarp over the chicken run could serve the purpose.
Size of the Coop
Chickens generally need at least 2-3 square feet of coop space each if they can access outdoor space, although 4 square feet is recommended for standard breeds. For instance, a 24-square-foot coop is ideal for housing six chickens.
If your chickens don’t have an outdoor run, you should provide 8 to 10 square feet per chicken inside the coop. The vertical space required, along with other specifications, depends on the chicken breed.

A well-designed coop needs nesting boxes, roosting bars, feeder and waterer space, and vents for airflow. When building coops, consider space to prevent overcrowding, which can cause behavioral issues, waste buildup, and disease risks.
Flooring and Material
There’s an abundance of material choices for building chicken coops, but some prove to be superior to others. Plywood stands out for its affordability and remarkable durability. It’s also easy to modify for ventilation, allowing you to create necessary openings or windows for your backyard flock. However, that wood is susceptible to rotting and might harbor mites. A popular workaround is to layer rolled linoleum over the wooden base as it simplifies cleaning and can be effortlessly replaced when needed.
Coop Elevation
Securing your flock from potential predators is a crucial factor in designing your chicken coop. Backyard chickens can fall prey to a host of predators including raccoons, coyotes, fisher cats, dogs, and certain species of snakes, some of which are particularly fond of chicks and might try to slither through the gap between the coop walls and the ground to reach them.
To deter snakes and other threats from infiltrating the coop from below, raising the coop about 8 to 12 inches off the ground is advisable—just enough to allow your chickens to stroll underneath. Alternatively, you might prefer a dirt floor with wire mesh underneath to deter predators that dig, over a floor that’s raised only slightly as rodents and snakes can make a home beneath it. If the chickens can access the space, they’ll help keep it clean.
Elevating the coop also contributes to preventing wood rot. Many chicken keepers prefer constructing the coop’s legs using pressure-treated lumber, while using untreated lumber for the rest of the structure. However, if the legs rest on bricks or concrete, avoiding direct contact with the ground, non-pressure-treated lumber could also be a viable choice.

An elevated chicken coop not only safeguards your flock from predators and dampness but also offers extra roaming space beneath the structure, turning your coop into a multifunctional element of your backyard.
Door and Latches
Predators often target the coop’s door as an entry point, making it essential to bolster all doors and vented windows with secure latches. Raccoons, for instance, are surprisingly adept at manipulating knobs, untying knots, undoing bungee cords, lifting latches, and even sliding deadbolts. Thus, using spring-loaded eye hooks or latches fastened with carabiners or padlocks can bolster your coop’s security. The door itself could be a simple plywood panel mounted on a 1-by-2 frame, furnished with hinges and a straightforward latch. Ensure it’s wide enough for comfortable entry and exit, even when you’re carrying eggs or a basket.
Nesting Boxes
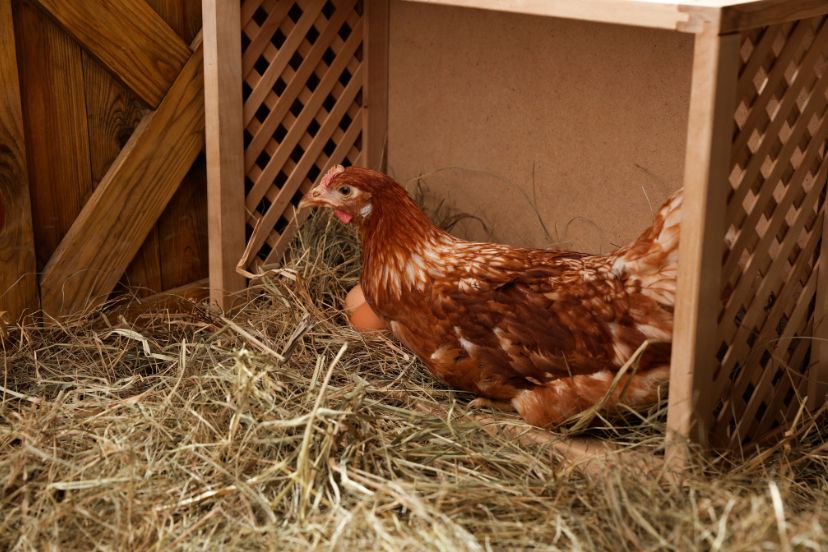
Ensure a ratio of one nest box for every three hens, each box roughly a square foot in size. Place them below the roosts to deter perching. It’s natural for chickens to huddle in the same box, so don’t fret! For larger breeds, allocate an extra square foot per bird. Nesting boxes should be filled with straw or sawdust to protect eggs from cracking. Chickens typically lay an egg every day or two. Including a few sand-filled “dust boxes” can promote dust bathing, a chicken’s natural method to stay clean and mite-free.

Nesting boxes provide a clean, safe space for hens to lay eggs, ensuring their comfort and promoting healthy laying habits.
Roosting Bars
Each hen requires approximately 8 inches for roosting, despite their tendency to huddle closely. This gives your chickens a spot to perch off the ground during the night. Consider integrating 1½-inch dowels high in your coop, at a minimum height of 2 feet from the ground, enabling your chickens to stay elevated and dry, particularly during the wetter and colder months.
Proper Ventilation
Approximately 20% of your coop’s wall area should be allocated for ventilation, vital for preventing diseases. Cut openings near the ceiling, above the roosts, to facilitate air circulation. Cover all these openings with sturdy 1/2-inch hardware cloth, securely fastened to bar predators. Remember, hardware cloth, made of a heavier gauge metal than chicken wire, is crucial for safeguarding your chickens; chicken wire isn’t predator-proof. As for insulation, chickens, although they prefer moderate temperatures around 55°F, can survive in quite cold winters thanks to their feather insulation. Some breeds even fare better in colder climates.
10 Steps on Building Chicken Coops:
- Groundwork Comes First: Ensure you’re not building post heavy rainfall as soft, porous ground can interfere with setting a robust foundation. Clear rocks, sticks, and potential predator shelters like overgrown shrubs or dangling branches.
- Choose Your Blueprint: For beginners, myriad user-friendly coop plans are available online, often gratis. An ideal chicken coop can be as simple as a shed made of reclaimed wood.
- Create Your Coop Skeleton: Make sure to meticulously construct your coop’s frame, as its solidity is paramount. Your focus should be on quality, not speed, as any compromises here could cost you later. Painting the exterior pieces before screwing them together helps weatherproof your coop.
- Attach Coop Walls: Attach plywood panels securely to the frame to form walls. Cut vents to ward off respiratory diseases and heatstroke in your chickens, and cover them with sturdy hardware mesh.
- Install the Floor: A wooden floor, despite seeming more complicated, ensures safety and dryness. Ensure it’s level, without any large knots or holes that could invite predators. Add hardware mesh beneath for an extra protective layer.
- Door Installation: Two doors are essential: one for the hens and another for human access. The dimensions depend on the breed of chicken, while the doors’ security plays a critical role in warding off predators.
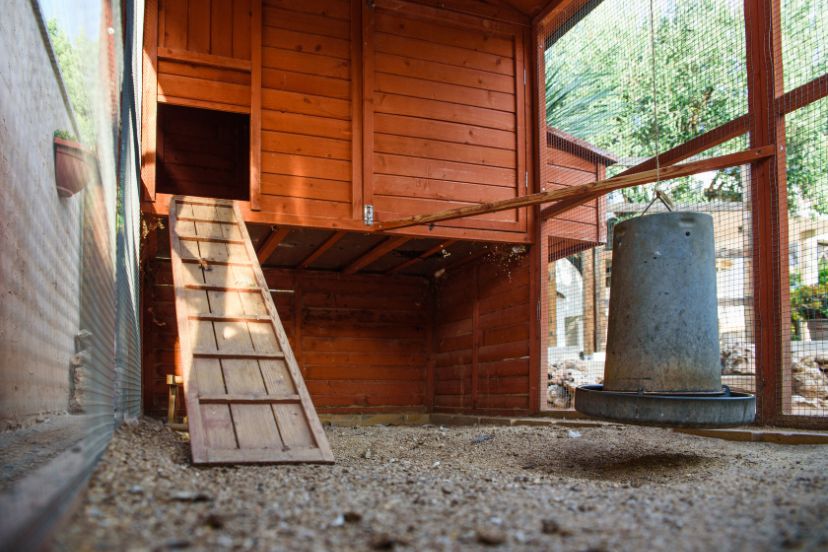
- Nest Boxes and Perches: This is your hens’ space for laying eggs, and a 2×4 perch should do the trick. Hens prefer higher places for sleeping, making perches a more attractive choice.
- Run Frame Construction: Although less heavy-duty than the coop, the run frame should still be robust to support chicken wire or hardware mesh.
- Run Fencing: Hardware mesh is more effective than chicken wire for keeping predators at bay. Although more expensive, its use at the base is recommended for added security against burrowers.
- Coop Accessories: Waterers and a long feed trough are essential, and bedding (pine shavings or straw) should be approximately 6-inches deep on the floor and in the nest boxes. Replace it monthly or as needed.
Final checks and regular maintenance are key to maintaining safe, happy, and healthy chickens. While building may take time, the joy of watching your chickens flourish in their new home is truly priceless.


